Home › Reviews › VEVOR 9011B Dissolved Oxygen Bluetooth Meter
VEVOR 9011B Dissolved Oxygen Bluetooth Meter Review (2026)
Disclosure: This page contains affiliate links. If you purchase through our links, we may earn a commission at no extra cost to you. See our affiliate disclosure.
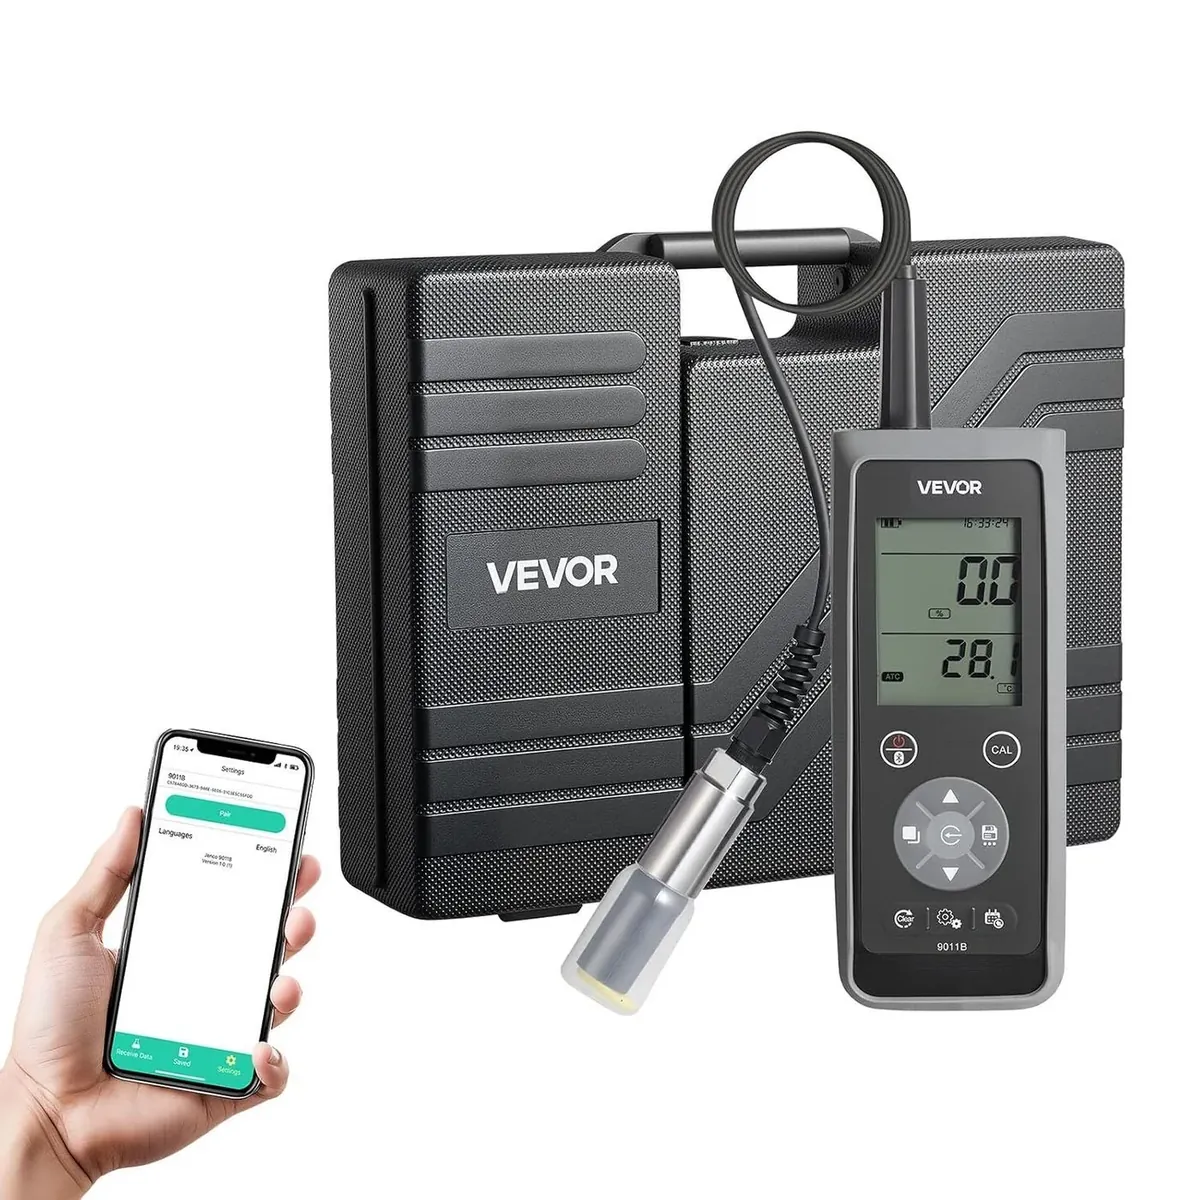
Best for: Environmental compliance sampling, regulatory monitoring with audit trails, aquaculture operations including oxygen supersaturation monitoring, field researchers, and any user who needs wireless data access or PC data export.
Save money with the 9011M if: 50 non-timestamped data points per session is sufficient, connectivity is not needed, and DO readings will not exceed 20 mg/L.
0–500.0% sat.
±0.2 mg/L
GLP timestamped
iOS & Android app
50+ hrs (BT off)
Excel-ready
Contents
- How the 9011B differs from the 9011M
- Full specifications
- Rechargeable battery — charging and replacement
- System setup menu (8 items)
- Probe preparation
- Calibration procedure
- 750-point GLP datalogger — save, recall, delete
- PC data transfer via USB-C
- Bluetooth app setup and functions
- Troubleshooting and error codes
- FAQ
How the 9011B Differs from the 9011M
The 9011B and 9011M use the same polarographic electrode technology and measure the same parameters — dissolved oxygen and temperature — but differ substantially in every capability that matters for professional or compliance-oriented use.
| Feature | 9011M | 9011B |
|---|---|---|
| DO range | 0–20 mg/L / 0–200% sat. | 0–50 mg/L / 0–500% sat. |
| DO accuracy (0–20 mg/L) | ±0.5% FS (±0.10 mg/L) | ±2% reading or ±0.2 mg/L (greater) |
| Memory | 50 data sets — no timestamp | 750 data sets — GLP date/time stamp on every record |
| Bluetooth | No | Yes — iOS & Android app, GPS tagging, cloud |
| PC data export | No | Yes — USB-C, CSV auto-formatted for Excel |
| Power | 9V battery, 250 hours | Rechargeable pack, 50+ hours (Bluetooth off); charges via USB-C |
| Calibration | 3-step (pressure, saturation, salinity during CAL) | 1-step air (pressure + salinity configured in System Setup) |
| System setup menu | Limited | 8-item menu: units, date/time format, calibration reminders, auto-shutoff |
| GLP compliance | No — no timestamps | Yes — timestamped records + calibration history |
| Price tier | Lower | Higher |
Full Specifications
| Parameter | Specification |
|---|---|
| Dissolved Oxygen Measurement | |
| DO range (mg/L) | 0–50.00 mg/L |
| DO resolution (mg/L) | 0.01 mg/L |
| DO accuracy — low range (0–20 mg/L) | ±2% of reading or ±0.2 mg/L, whichever is greater |
| DO accuracy — high range (20–50 mg/L) | ±6% of reading |
| DO range (% saturation) | 0–500.0% |
| DO resolution (% sat.) | 0.1% |
| DO accuracy — low range (0–200%) | ±2% of reading or ±2% air saturation, whichever is greater |
| DO accuracy — high range (200–500%) | ±6% of reading |
| Measurement method | Polarographic (Clark-type) electrode |
| Calibration | 1-point air calibration (pressure + salinity set in System Setup) |
| Calibration storage | EEPROM — survives power cycles |
| Temperature | |
| Temperature range | -6.0 to +46.0°C / -42.8 to +114.8°F |
| Temperature resolution | 0.1°C / 0.2°F |
| Temperature accuracy | ±0.3°C / ±0.6°F |
| Data and Connectivity | |
| Memory | 750 data sets with GLP date/time stamps (EEPROM) |
| Bluetooth | Yes — iOS and Android companion app |
| PC connectivity | USB-C — CSV export to Excel (driver embedded in meter) |
| App features | Live data, GPS location tagging, cloud storage, data sharing, compliance policies, 750-record storage |
| Power and Physical | |
| Battery | Rechargeable pack (750 mAh, 2 cells) via USB-C |
| Battery life | >50 hours with Bluetooth off; reduced with Bluetooth active |
| Battery cycle life | ≥300 charge cycles at 25°C |
| Charging port | USB-C (also used for PC data transfer) |
| IP rating | IP67 |
| Operating temperature | 0–50°C |
| Operating humidity | <90% RH |
| Probe cable length | 13.1 ft (4 m) |
| Probe connector | 6-pin waterproof |
| Dimensions (meter) | 8.5 × 3.1 × 2.2 in (217 × 80 × 55 mm) |
| Source: VEVOR Official 9011B User Manual (MODEL9011B.pdf). | |
Rechargeable Battery — Charging and Replacement
The 9011B replaces the 9011M's disposable 9V battery with a rechargeable pack. This eliminates the need to carry spare batteries and keeps the USB-C port doing double duty for both charging and PC data export.
Charging
- Connect the included USB-C cable to the meter's Type-C port and to any USB power source: phone/tablet AC adapter, PC USB port, or external USB power bank.
- The Battery icon on the LCD flashes while charging.
- The Battery icon stops flashing when fully charged.
- Battery life: >50 hours with Bluetooth off. Bluetooth connectivity reduces runtime — the manual does not specify Bluetooth-on battery life.
Battery Pack Replacement (End of Life — ≥300 Cycles)
Remove four screws from battery compartment cover
Use a screwdriver to remove all four screws. Set aside.
Remove old battery pack
Grasp the battery pack connector with two fingers and pull straight up to disconnect. Remove the old pack and dispose of properly (rechargeable batteries require recycling, not landfill disposal).
Seat new battery pack
Correctly orient and seat the new battery pack into the meter body. Align the connector wire terminals with the meter pin connectors, then press together carefully. Verify the connection is fully seated.
Replace cover and tighten all four screws
Replace the battery compartment cover. Tighten all four screws fully to restore the IP67 waterproof seal.
System Setup Menu — 8 Items
The 9011B's 8-item System Setup menu (press SET key) is one of the clearest differentiators from the 9011M. It allows configuration of calibration reminder intervals, date and time for GLP timestamp accuracy, pressure and salinity for measurement compensation, temperature units, and auto-shutoff. Press Mode at any point during setup to exit without saving the current item's change.
| Item | Parameter | Options / Range | Default |
|---|---|---|---|
| 1 | RECAL reminder | 0–60 days | 0 (off) |
| 2 | Date format | 3 formats (MM/DD/YY, DD/MM/YY, YY/MM/DD) + year/month/day entry | — |
| 3 | Time format | 12H or 24H + hour/minute/second entry | — |
| 4 | Pressure units + value | mBar or hPa; 600–1,100 | 1,013 mBar |
| 5 | Salinity units + value | ppt or g/L; 0.0–40.0 | 0.0 ppt |
| 6 | Temperature unit | °C or °F | °C |
| 7 | Auto shut-down | OFF / 10 / 20 / 30 minutes | — |
| 8 | Reset | YES / no (date/time preserved on reset) | — |
| Set date and time accurately before first use — every saved reading is GLP timestamped. An incorrect clock produces an incorrect audit trail. Source: VEVOR 9011B Manual. | |||
Probe Preparation
Probe preparation on the 9011B is identical to the 9011M. See the detailed 6-step procedure in the 9011M review — the membrane cap, electrolyte, guard cap, and calibration bottle procedure are the same on both meters. The 5 mm minimum clearance between probe membrane and calibration bottle sponge applies equally.
Calibration Procedure
The 9011B uses a simplified 1-point air calibration compared to the 9011M's 3-step process, because pressure and salinity are set in System Setup rather than during calibration. This makes field recalibration faster.
Optional: clear stored calibration
In Measure mode, press and hold the Clear key for 5 seconds. All LCD elements illuminate briefly, confirming all stored calibration values are erased. Recommended when changing membrane or electrolyte.
Power on and prepare calibration bottle
Turn on the meter. Connect the DO probe. Add 5–6 drops of water to calibration bottle sponge, drain excess, insert probe with at least 5 mm clearance from sponge.
Position probe and warm up — 10 to 15 minutes
In Measure mode, hold the probe gently in air with the sensor facing downward. Wait 10–15 minutes for both DO reading and temperature to fully stabilize.
Enter calibration mode
Press and hold the CAL key for 3 seconds. The CAL icon appears on the LCD. The secondary display shows the current calibration value.
Save calibration
Once the value in the main display has stabilized, press Enter to save. Press Mode to exit Calibration mode. If Mode is pressed before Enter, changes are canceled and previous calibration values are retained.
750-Point GLP Datalogger
The 750-point datalogger is the feature that most distinguishes the 9011B from entry-level DO meters. Every saved reading includes a date and time stamp, making the data record GLP (Good Laboratory Practice) compliant — suitable for regulatory reporting and audit review.
| Operation | Procedure | Notes |
|---|---|---|
| Save | In Measure mode, press and hold the Save key for 3 seconds. Save icon + site number flash to confirm. | Full icon appears at 750 records — delete before saving new readings. Each record includes date + time stamp. |
| Recall | Short press Save → "rCL" appears → Enter to enter Recall mode → Up/Down to scroll by site number → Date/Time key to toggle date and time display for each record → Mode to exit. | Date/Time key switches between viewing date stamp and time stamp for the selected record. |
| Delete All | Save → "dEL ALL" → Enter → Up/Down to select YES → Enter to confirm. "nonE" appears after deletion. | All 750 records erased. Irreversible. |
| Delete Each | Save → "dEL EACH" → Enter → Up/Down to target record → Enter to delete. Repeat as needed. Mode to exit. | Remaining records automatically shift up one slot. |
PC Data Transfer via USB-C
The 9011B exports all stored data as a CSV file directly to a Windows PC. No third-party software is required — the meter includes an embedded driver and appears as a removable drive.
Connect and install driver (first use only)
Connect the meter to a PC via the USB-C cable with the meter powered on. The driver embedded in the meter downloads and installs automatically. No external driver download is needed.
Open Windows Explorer — find "VEVOR" drive
The PC recognizes the 9011B as a removable drive named "VEVOR." Navigate to this drive in Windows Explorer.
Copy the Record CSV file
One CSV file named "Record" contains all current meter data plus the 5 most recent calibration records. Copy this file to your PC. The CSV is recreated each time data is saved or the meter is powered on.
Open in Excel
Double-click the CSV file. The file includes a "sep=;" header line that directs Excel to use a semicolon as the delimiter — columns format correctly automatically without needing the Text Import Wizard.
Bluetooth App Setup and Functions
Download the companion app from the Apple App Store (iOS) or Google Play Store (Android). Grant Bluetooth and GPS permissions during installation — both are required for full app functionality. On Android, select Optimized Power Mode to maintain a reliable Bluetooth connection.
Pairing the Meter to the App
Power on the meter
Press and hold the Power/BLE key for 3 seconds to power on.
Enable Bluetooth on the meter
Short-press the Power/BLE key. The Bluetooth icon on the LCD fast-blinks — the meter is ready to pair.
Pair in the app
Open the companion app. Tap Settings → Pair. The app searches for nearby VEVOR Bluetooth devices.
Connect
When "9011B" appears in the app, tap Connect. The Bluetooth icon on the LCD stops blinking and lights solid. The app displays "Ready for data" and begins showing live meter readings.
| App Feature | Description |
|---|---|
| Live readings | Real-time DO and temperature displayed on phone/tablet screen |
| GPS location tagging | Automatically records GPS coordinates with each saved reading — links measurements to map location |
| Cloud storage | Data synced to cloud for access from multiple devices |
| GLP data records | 750-record storage in app with timestamps and GPS data |
| Data sharing | Export and share data records directly from the app |
| Compliance policies | Configurable compliance parameters for regulatory monitoring programs |
| Sync direction | Meter log data syncs to app; changes in app do not write back to meter |
| One meter per app | App pairs with one meter at a time. App remembers first paired device. |
Troubleshooting and Error Codes
| Problem / Display | Cause | Resolution |
|---|---|---|
| Will not turn on / BAT symbol | Battery depleted or not charging | Charge via USB-C until Battery icon stops flashing. Verify USB-C cable and power source are working. If battery is at end of service life (≥300 cycles), replace battery pack. |
| Temperature Over or Under on secondary display | Sample temp outside -6 to +46°C range | Bring sample within operating range. If error persists at normal temperature, temperature sensor may have failed — contact VEVOR service. |
| DO Over display (>50 mg/L) | Oxygen supersaturation above 50 mg/L range, or probe in air | Verify probe is submerged. If measuring supersaturated water above 50 mg/L, the 9011B is at its upper range limit. |
| DO Under display (<0 mg/L) | Electrolyte issue or membrane failure | Check membrane cap installation and electrolyte fill. Inspect membrane for damage. |
| Will not calibrate | Insufficient warm-up; incorrect pressure/salinity in System Setup; unstable environment | Allow full 10–15 minute warm-up. Verify pressure and salinity are correctly configured in System Setup before calibrating. Shield probe from drafts during calibration. |
| DO readings inaccurate | Temperature compensation error; membrane fouled; recalibration needed | Verify temperature reading is accurate. Check membrane and electrolyte. Clear calibration (hold Clear 5 sec) and recalibrate. |
| Bluetooth not connecting | Meter not in pairing mode; Android power management interference | Short-press Power/BLE key to enable Bluetooth (icon should fast-blink). On Android, set Optimized Power Mode. If connected >2 minutes ago and dropped, force-close and reopen app. |
| CSV file not appearing on PC | Driver not installed; meter not recognized | Verify meter is powered on before connecting USB-C. On first connection, wait for driver auto-install to complete. Check Windows Explorer for "VEVOR" removable drive. |
| Readings drifting downward in stagnant sample | Oxygen depletion at membrane (normal for polarographic electrodes) | Gently move probe during measurement to replenish water at membrane surface. |
FAQ
How do I connect the 9011B to the Bluetooth app?
Power on (hold Power/BLE 3 seconds). Short-press Power/BLE — Bluetooth icon fast-blinks. Open the app (App Store or Google Play), tap Settings → Pair. When "9011B" appears, tap Connect. Icon goes solid when paired. Full procedure above.
How do I transfer data to a PC?
Connect via USB-C with meter powered on. First connection installs the embedded driver automatically. Open Windows Explorer — find "VEVOR" removable drive. Copy the "Record" CSV file. Open in Excel — semicolon delimiter formats automatically. No third-party software required.
What is GLP compliance and why does it matter?
GLP (Good Laboratory Practice) compliance means every saved reading includes a date and time stamp — creating a complete auditable record of when each measurement was taken. Required for regulatory compliance reporting, environmental monitoring programs, and research data subject to third-party review. The 9011M stores readings without timestamps; the 9011B includes them on all 750 records.
What is the DO range of the 9011B?
0–50.00 mg/L (0.01 mg/L resolution) and 0–500.0% saturation (0.1% resolution). Accuracy is ±2% of reading or ±0.2 mg/L in the 0–20 mg/L range; ±6% of reading in the 20–50 mg/L range. The extended range above 20 mg/L covers oxygen supersaturation in intensive aquaculture systems.
How does the 9011B compare to the 9011M?
The 9011B adds Bluetooth app, 750-point GLP timestamped datalogger, USB-C PC export, extended 0–50 mg/L range, rechargeable battery, and 8-item system setup at a higher price. The 9011M has 50-point non-timestamped memory, no connectivity, 9V battery, and a lower price. See the full comparison table above or the 9011M review.