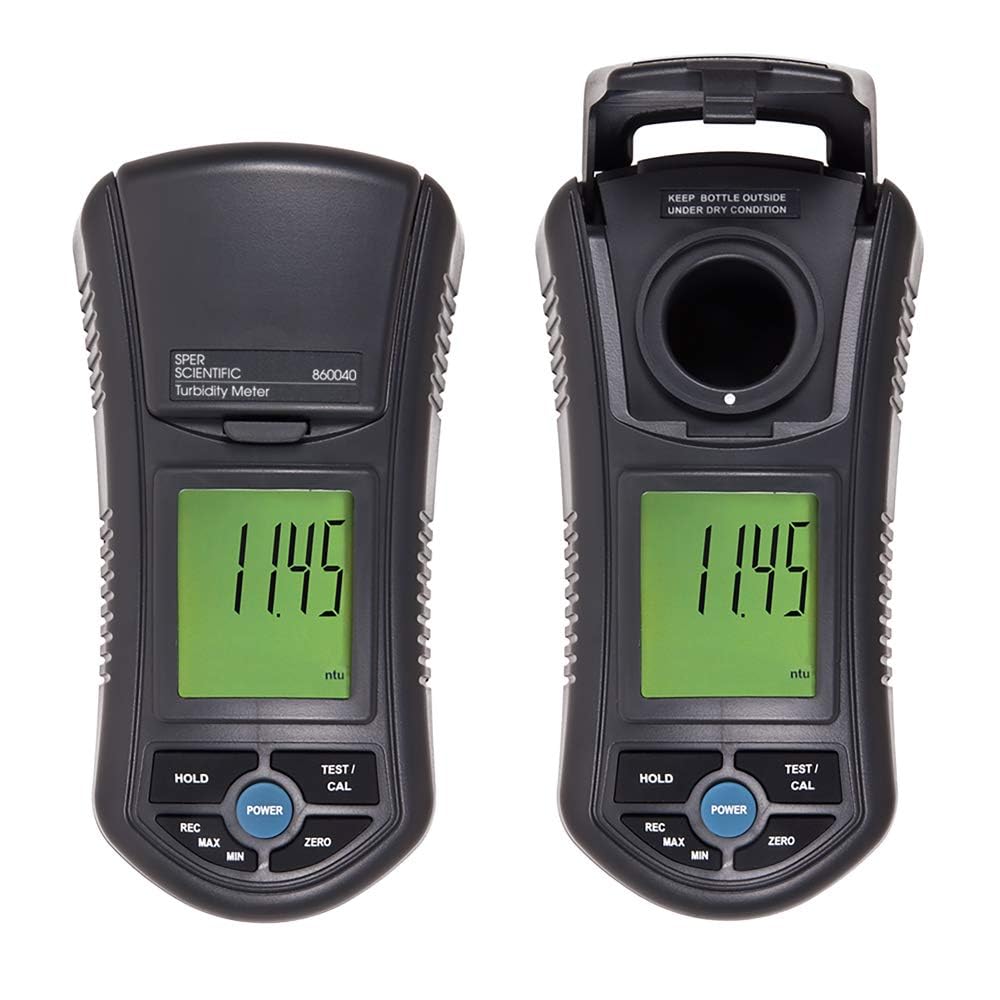
Sper Scientific 860040 Turbidity Meter Review (2026)
Best for: Drinking water field screening, filter performance verification, wastewater effluent monitoring, brewing and beverage QC, and environmental sampling.
Limitation: The ±0.5 NTU accuracy floor at low readings means this is not the instrument for regulatory compliance reporting near the EPA 1 NTU drinking water limit.
Contents
Full Technical Specifications
All specifications from the Sper Scientific 860040 Instruction Manual, revision 10/27/2023.
| Parameter | Specification |
|---|---|
| Measurement | |
| Low range | 0.00–49.99 NTU |
| Low range resolution | 0.01 NTU |
| Low range accuracy | ±5% of reading or ±0.5 NTU (whichever is greater) |
| High range | 50–1000 NTU |
| High range resolution | 1 NTU |
| High range accuracy | ±5% of reading or ±5 NTU (whichever is greater) |
| Measurement method | Nephelometric (90° scatter detection), ISO 7027 compliant |
| Calibration | Two-point self-calibration: 0 NTU and 100 NTU standards supplied |
| Instrument | |
| Battery | 6× AAA 1.5V alkaline |
| Battery life | 250 hours |
| Auto-shutoff | 10 minutes inactivity |
| Memory | 50-sample min/max mode (min and max values only; cleared on exit) |
| Operating temperature | 0–50°C |
| Operating humidity | <85% RH |
| Display | Large backlit LCD |
| What's Included | |
| Calibration standards | 0 NTU and 100 NTU bottles (in protective cases) |
| Sample bottles | 2× glass sampling vials |
| Accessories | Low-lint cloth, distilled water for cleaning |
| Case | Hard carrying case with custom foam interior |
| Manual | Yes |
| Batteries | 6× AAA included |
| Warranty | 1 year (covers repair or replacement; excludes vials, batteries, misuse) |
Understanding the Accuracy Specification
The "±5% of reading OR ±0.5 NTU, whichever is greater" specification requires some unpacking because the practical accuracy changes across the measurement range.
| Reading (NTU) | ±5% Calculation | Floor Value | Actual Accuracy | Note |
|---|---|---|---|---|
| 1.0 NTU | ±0.05 NTU | ±0.5 NTU | ±0.5 NTU | Floor dominates — near EPA 1 NTU limit |
| 5.0 NTU | ±0.25 NTU | ±0.5 NTU | ±0.5 NTU | Floor still dominates |
| 10.0 NTU | ±0.5 NTU | ±0.5 NTU | ±0.5 NTU | Crossover point |
| 20.0 NTU | ±1.0 NTU | ±0.5 NTU | ±1.0 NTU | Percentage dominates |
| 50.0 NTU | ±2.5 NTU | ±5.0 NTU | ±5.0 NTU | High-range floor kicks in |
| 200.0 NTU | ±10.0 NTU | ±5.0 NTU | ±10.0 NTU | Percentage dominates in high range |
Complete Calibration Procedure
Two-point calibration using the supplied 0 NTU and 100 NTU standards establishes both the zero offset and the gain of the optical system. Calibrate before each measurement session, after switching sample types, and whenever readings seem inconsistent.
Pre-Calibration Preparation (do before starting the timer)
Remove both calibration bottles from their cases. Tighten caps and shake gently to mix. Clean the exterior of each bottle completely — fingerprints on glass scatter light and alter calibration. Handle by the cap from this point. Confirm the test chamber interior is clean. Power on the meter.
Enter calibration mode
Press and hold the TEST/CAL button until "CAL" appears on the LCD, then release.
Zero point — 0 NTU standard
Screen shows "0.00." Place the 0 NTU bottle in the chamber. Align the vertical white line on the bottle with the white dot on the meter body. Close the lid. Press TEST/CAL once. Screen flashes "CAL" for up to 10 seconds while processing.
Watch for the prompt
When flashing stops and screen shows "100," zero calibration succeeded. You now have 20 seconds for the next step.
Gain point — 100 NTU standard
Remove the 0 NTU bottle. Place the 100 NTU bottle. Align white line to white dot. Close the lid. Press TEST/CAL once. Screen flashes "CAL" again for up to 10 seconds.
Calibration complete
When flashing stops and screen returns to "0.0," calibration is stored and the meter is ready to measure. Calibration is retained through auto-shutoff — no need to recalibrate between samples in the same session.
Measurement Modes
Single-Point Measurement
For individual samples or routine spot checks. Pour sample into a clean vial, shake to suspend any settled particles, tighten cap, clean exterior, align white line, close lid, press TEST/CAL once. Read the NTU value. Use Data Hold to freeze the reading before recording.
Multi-Point Mode (up to 50 samples)
Records minimum and maximum turbidity values across a set of samples — useful for batch QC of a production run, tracking a single high-sediment sample across multiple mix/settle cycles, or screening a large set to identify outliers.
Press MIN/MAX to enter — "REC" appears on screen. Measure each sample with TEST/CAL. When done, press MIN/MAX to lock the set (no new readings after this). Press MIN/MAX again to view minimum; again to view maximum. Press and hold MIN/MAX to exit and clear all stored values.
Data Hold
Freezes the current reading on screen. Press HOLD once — "Hold" appears on LCD. Record the value. Press HOLD again to return to Normal Mode. Note: MIN/MAX mode and new sample readings are disabled while HOLD is active — exit Hold before taking the next measurement.
Zero Adjustment: What It Is and When to Use It
Zero Adjustment and calibration are completely different operations. The manual is explicit on this: Zero Adjustment is NOT a calibration.
Calibration (two-point, using 0 NTU and 100 NTU standards) establishes the instrument's absolute accuracy across its full range. It must always be performed first and is required for accurate measurements against any absolute turbidity standard.
Zero Adjustment sets a custom application-specific offset. It allows you to define a practical zero baseline for your sample matrix rather than the absolute 0 NTU standard, and applies an offset to all subsequent readings. Effective range: up to 2.0 NTU.
When Zero Adjustment Is Useful
- Filtration system verification — zero on the cleanest filter output so all subsequent readings show turbidity relative to that best-case baseline
- Drinking water distribution spot checks — where all expected values are well below 1 NTU and relative comparison matters more than absolute measurement
- Well water after treatment — confirming residual turbidity at distribution points
- Surface water baseline monitoring — in calm conditions where absolute turbidity is low and you want to track deviations from the baseline
Zero Adjustment is automatically reset whenever you run the full two-point calibration or use the 0 NTU standard. To zero: obtain a sample of your lowest expected turbidity, place in a clean vial, align, close lid, press and hold ZERO until "ZERO" appears on screen — all subsequent readings will be offset accordingly.
Commercial Application Matrix
| Application | Typical Turbidity Range | How 860040 Is Used | Limitation |
|---|---|---|---|
| Drinking water — field screening | 0.1–5 NTU | Spot-check at distribution points; verify filter output; flag high-turbidity samples for lab analysis | Not for compliance reporting — requires lab instrument |
| Wastewater effluent monitoring | 5–100 NTU | Pre-discharge turbidity check; verify treatment performance; screen against NPDES permit benchmarks | High range accuracy ±5 NTU limits resolution on permit-boundary readings |
| Brewing — process QC | 0–500+ NTU (varies by stage) | Wort clarity, filtration monitoring, post-filter verification, bright beer confirmation | Full 0–1000 NTU range covers typical brewing applications |
| Environmental sampling | 0–500 NTU | Surface water, runoff, discharge monitoring per MSGP permit benchmarks (50 NTU benchmark) | Field readings; verify against MSGP 50 NTU benchmark for industrial stormwater |
| Industrial process water | 5–200 NTU | Incoming water quality verification; filtration performance monitoring; cooling water clarity | Well-suited for process control where ±5% accuracy is sufficient |
| Pharmaceutical / beverage | 0.1–50 NTU | Water quality for process inputs; verify RO permeate or filtered source water | For compliance-grade pharmaceutical applications, validate against approved laboratory method |
| Aquaculture | 0–100 NTU | Tank and pond turbidity monitoring for fish health and feeding windows | Suited for operational monitoring — not regulatory reporting |
Care and Maintenance
Additional maintenance requirements from the official manual:
- Store with the lid closed at all times — prevents debris from entering the test chamber and contaminating the optical lens
- Periodically wipe the interior of the test chamber with a lint-free cloth — dust on the internal lens creates a positive turbidity offset on all readings
- Do not use abrasives, solvents, or cleaning agents containing carbon, alcohol, or benzenes on any part of the meter or vials
- Wipe the meter body with a dry, lint-free antistatic cloth
- Store calibration standards in their protective cases; inspect before use; never top off an old bottle with fresh standard
- Repairs beyond battery replacement and external cleaning: contact Sper Scientific (480) 948-4448
Troubleshooting and Error Codes
| Problem | Cause | Resolution |
|---|---|---|
| ERR 0 during calibration | Meter cannot achieve valid calibration point | Three-step resolution: (1) Clean outside of calibration bottles and test chamber interior thoroughly. (2) Clear stored calibration: press and hold TEST/CAL, then press ZERO — release both; repeat calibration. (3) If ERR 0 persists after cleaning: replace the calibration standards — they may be expired, contaminated, or depleted. |
| "Test" appears mid-calibration | 20-second step timeout exceeded | The meter has exited calibration mode without storing. Start the full calibration sequence over from Step 1. Prepare both bottles before beginning. |
| Readings higher than expected | Dirty vial exterior, dirty chamber lens, or fingerprints on glass | Clean vial exterior and chamber interior. Handle vials by cap only after cleaning. |
| Readings lower than expected on sediment-containing sample | Settleable solids have sunk to vial bottom | Shake sample vigorously and measure immediately while fully suspended. |
| Inconsistent readings on same sample | Bottle misalignment | Verify white line on bottle aligns with white dot on meter body at every reading. |
| Low battery icon blinking | Batteries depleted | Replace all 6× AAA batteries. Turn meter off before replacing. Calibration data is retained through battery change if meter is powered off normally first. |
FAQ
What is the accuracy of the Sper Scientific 860040?
In the low range (0–49.99 NTU): ±5% of reading or ±0.5 NTU, whichever is greater. At readings near 1 NTU, the ±0.5 NTU floor dominates. In the high range (50–1000 NTU): ±5% of reading or ±5 NTU, whichever is greater. See the accuracy table above for specific examples across the range.
Can the 860040 be used for drinking water compliance monitoring?
For field screening and process monitoring, yes. For regulatory compliance reporting, no — the ±0.5 NTU floor is too wide to reliably confirm compliance with the EPA 1 NTU monthly average limit. Compliance reporting requires NIST-traceable laboratory nephelometers.
How do I calibrate the Sper 860040?
Two-point calibration with the included 0 NTU and 100 NTU standards. Prepare both bottles before starting (clean exterior, shake, handle by cap). Press and hold TEST/CAL until CAL appears. Insert 0 NTU bottle (aligned), close lid, press TEST/CAL. When screen shows 100, insert 100 NTU bottle (aligned), close lid, press TEST/CAL. When screen returns to 0.0, calibration is complete. You have 20 seconds per step — see the full procedure above.
What is the Zero Adjustment function?
A user-defined offset that sets a custom zero baseline for your specific application — not a replacement for two-point calibration. Useful for low-turbidity applications below 2.0 NTU where relative changes from a known reference point matter more than absolute NTU values. Always calibrate with the standard procedure first; Zero Adjustment is applied afterward.
What causes ERR 0?
The meter cannot achieve a valid calibration point — most commonly caused by a dirty calibration bottle exterior, contamination inside the test chamber, or expired/contaminated calibration standards. Work through the three-step resolution in order: clean → clear stored calibration → replace standards.
- VEVOR TN1000 Turbidity Meter — Professional Step-Up with 5-Point Calibration
- Hach 2100Q Turbidimeter Review
- Hach Water Test Kits — Hardness, Chlorine, and Field Testing
- Hach DR300 Pocket Colorimeter
- Industrial Wastewater — MSGP Monitoring and Turbidity Benchmarks
- All Water Quality Instrument Reviews