Home › Reviews › Allegro DI Spot-Free Rinse System
US Water Systems Allegro DI Spot-Free Rinse System Review (2026)
Disclosure: This page contains affiliate links. If you purchase through our links, we may earn a commission at no extra cost to you. See our affiliate disclosure.
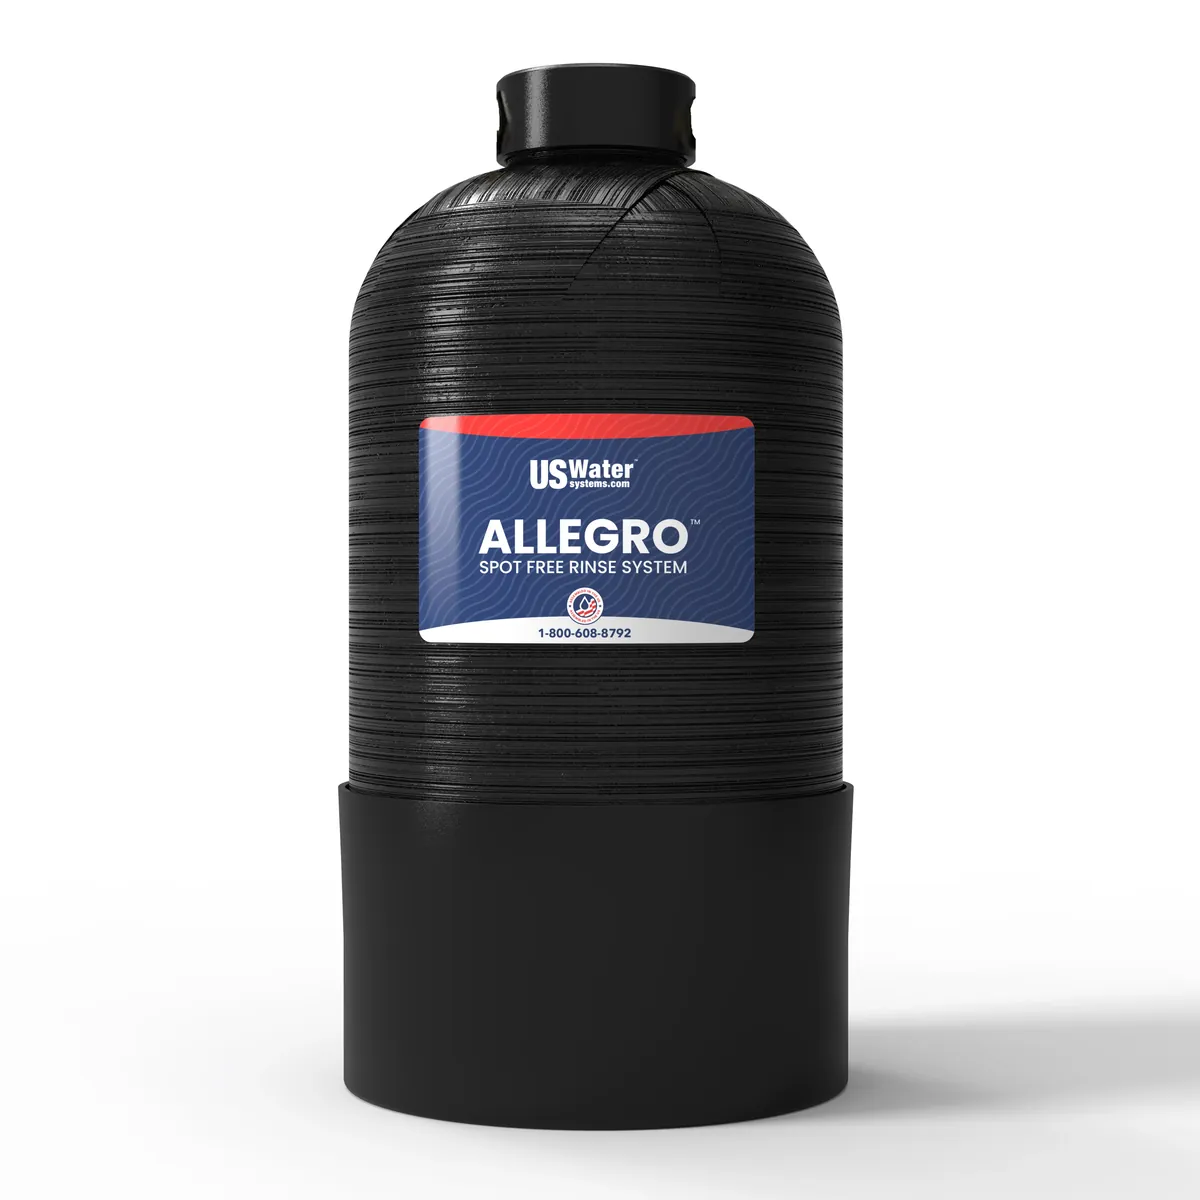
Best for: Car detailers, boat owners, RV owners, window cleaners, and solar panel maintenance on residential or mobile setups where hard water is leaving spots and a no-plumbing solution is preferred.
Key variable: Feed water TDS determines everything about resin life. Test your tap water before buying to know what to expect.
117-SFR-1.0
mixed-bed DI
10×35″ (1.0)
Replace at ~20 ppm
inlet and outlet
no tools required
Contents
- How DI produces spot-free water
- Specifications: both models compared
- TDS monitoring — your most important tool
- Resin capacity by feed water TDS
- How to extend resin life 3–5×
- Setup procedure — step by step
- Recommended wash sequence
- Resin replacement — complete procedure
- O-ring maintenance
- Applications
- Which model to choose
- Troubleshooting
- FAQ
How DI Produces Spot-Free Water
Water spots form because tap water — from a municipal system or a well — contains dissolved mineral ions: calcium (Ca²⁺) and magnesium (Mg²⁺) for hardness, plus sodium, chloride, bicarbonate, sulfate, and silica. When water droplets evaporate from a vehicle panel or glass surface, all the water molecules leave as vapor — but the dissolved minerals cannot. They remain on the surface as white, chalky deposits. Higher TDS water leaves more mineral residue per droplet and causes worse spotting.
Deionization removes these dissolved ions through mixed-bed ion exchange. The Allegro's tank contains two types of resin beads blended together:
| Resin Type | Charge | What It Exchanges | Net Effect on Water |
|---|---|---|---|
| Cation resin | Negatively charged (-SO₃H) | Captures positively charged cations (Ca²⁺, Mg²⁺, Na⁺, K⁺); releases H⁺ (hydrogen ion) | Removes hardness and dissolved metals; water becomes slightly acidic |
| Anion resin | Positively charged (-NR₃OH) | Captures negatively charged anions (Cl⁻, SO₄²⁻, HCO₃⁻, SiO₂); releases OH⁻ (hydroxide ion) | Removes dissolved salts and silica; H⁺ and OH⁻ combine to form water |
| Result: all dissolved ions captured; H⁺ and OH⁻ released by the resin beads combine to form water molecules. Net output: 0 ppm TDS water with nothing left behind when it evaporates. | |||
Why Resin Cannot Be Regenerated at Home
Regeneration of mixed-bed resin requires separating the cation and anion bead types, flushing the cation resin with strong acid (typically hydrochloric or sulfuric acid) and the anion resin with strong caustic (sodium hydroxide), then carefully remixing in the correct ratio. The equipment required for this process costs in excess of $10,000 according to US Water Systems. For residential and mobile DI systems, resin replacement — not regeneration — is the correct maintenance approach.
Specifications: Both Models Compared
| Specification | 117-SFR-0.5 | 117-SFR-1.0 |
|---|---|---|
| Model number | 117-SFR-0.5 | 117-SFR-1.0 |
| Tank dimensions | 10″ × 17″ | 10″ × 35″ |
| Resin volume | 0.5 cubic feet | 1.0 cubic feet |
| Resin type | Virgin mixed-bed DI resin (cation + anion blend) | |
| Inlet/Outlet connection | 3/4″ Male Pipe Thread (MPT) — garden hose compatible via included brass fittings | |
| Inlet fitting (included) | 3/4″ MPT × Female Swivel Hose fitting | |
| Outlet fitting (included) | 3/4″ MPT × Male Hose fitting | |
| Target output TDS | 0 ppm (new/freshly charged resin) | |
| Resin replacement threshold | ~20 ppm outlet TDS | |
| TDS meter | Included | |
| Ships pre-filled | Yes — ready to use within minutes | |
| Electrical requirement | None | |
| Plumbing requirement | None — standard garden hose connection | |
| Warranty | 10 years (tank); see terms for components | |
| Source: US Water Systems Allegro DI Spot-Free Rinse Manual (Spot_Free_Rinse_Manual.pdf) and product page. | ||
TDS Monitoring — Your Most Important Tool
The included TDS meter is not an optional accessory. It is the only tool that tells you in real time whether the Allegro is producing spot-free water. The meter measures electrical conductivity — pure deionized water conducts almost no electricity; dissolved ions conduct in proportion to their concentration.
| Outlet TDS Reading | What It Means | Action |
|---|---|---|
| 0–10 ppm | Excellent — true spot-free output | Continue using; resin has capacity |
| 10–20 ppm | Acceptable — minimal spotting possible on some surfaces | Monitor closely; plan resin replacement soon |
| ~20 ppm | Replacement threshold per US Water Systems manual | Replace resin — spotting will be visible on most vehicles |
| Above 20 ppm | Resin exhausted — water spots will appear | Replace resin before next use |
How to Use the TDS Meter Correctly
- Always test flowing water from the outlet — not standing water. Hold the probe in the stream for 2–3 seconds for a stable reading.
- Test your inlet (tap) TDS before first use — this gives you a baseline to understand how hard your water is and what to expect for resin life.
- Test at the start of every session, and again mid-session on an older resin bed — TDS can rise during use as the resin approaches exhaustion.
- Record TDS readings over time to track the decline curve — this lets you predict when replacement is coming rather than being surprised.
Resin Capacity by Feed Water TDS
The official manual is direct: resin capacity is dependent entirely on the quality of the water fed to the tank. The worse the feed water quality, the fewer gallons of pure water the tank produces. Test your tap water TDS before first use — that single number predicts your resin replacement interval better than any other variable.
| Feed Water TDS | Water Hardness (approx.) | 0.5 cu/ft Capacity (est.) | 1.0 cu/ft Capacity (est.) | Final-Rinse-Only Washes (approx.) |
|---|---|---|---|---|
| 50 ppm | Soft | ~2,000 gal | ~4,000 gal | 130–400 washes |
| 100 ppm | Slightly hard | ~1,000 gal | ~2,000 gal | 65–200 washes |
| 150 ppm | Moderately hard | ~650 gal | ~1,300 gal | 43–130 washes |
| 200 ppm | Hard | ~500 gal | ~1,000 gal | 33–100 washes |
| 300 ppm | Very hard | ~325 gal | ~650 gal | 22–65 washes |
| 400 ppm | Very hard | ~250 gal | ~500 gal | 17–50 washes |
| 500 ppm | Extremely hard | ~200 gal | ~400 gal | 13–40 washes |
| Estimates based on US Water Systems capacity guidance (0.5 cu/ft at ~110 ppm TDS ≈ 1,000 gallons) and industry-standard DI benchmarks. Final-rinse-only range assumes 5–15 gallons per vehicle wash. Actual capacity varies with water chemistry beyond TDS alone (CO₂, silica, temperature). These are estimates, not guarantees. | ||||
How to Extend Resin Life 3–5×
The single most effective way to extend resin life is to use DI water only for the final spot-free rinse, not throughout the entire wash process. This is the strategy US Water Systems specifically recommends and it works because the final rinse requires only 5–15 gallons of DI water, versus 30–80 gallons if DI water is used throughout the wash.
Setup Procedure — Step by Step
The Allegro ships in two boxes, pre-filled with virgin resin, and is ready to use within minutes. No plumbing experience, tools beyond your hands, or specialized equipment are required. You will need Teflon (PTFE) tape — not included, available at any hardware store for under $2.
Unbox and lay out all components
Remove the tank (with temporary shipping cap), In/Out head, two brass hose fittings, and the TDS meter from both boxes.
Remove the temporary cap
Unscrew and remove the temporary black cap from the top of the resin tank. This cap seals the tank during shipping only and is not reinstalled.
Install the In/Out head — O-ring first
Slide the upper basket over the distributor tube (the center pipe running down into the resin bed). Before threading the head onto the tank, confirm the O-ring is seated evenly in its groove on the head — a twisted or displaced O-ring will cause leaks around the head. Screw the head clockwise until snug and the O-ring is sealed against the tank top.
Apply Teflon tape to both fittings
Wrap Teflon tape clockwise (same direction as threading) around the male pipe threads on both brass fittings — 3–4 wraps. This creates a watertight seal. Do not skip this step.
Install the inlet fitting
Screw the 3/4″ MPT × Female Swivel Hose fitting into the port marked IN on the top of the head. Hand tight.
Install the outlet fitting
Screw the 3/4″ MPT × Male Hose fitting into the port marked OUT on the top of the head. Hand tight.
Connect hoses
Connect your water supply hose from the outdoor spigot to the INLET fitting. Connect your rinse hose from the OUTLET fitting to your spray nozzle or pressure washer inlet.
Flush and test
Turn on the water at the spigot. Let water flow for 30–60 seconds to flush any resin fines that may have settled during shipping. Test the outlet with the TDS meter — a properly charged virgin resin tank should read 0 ppm or very close to it.
Recommended Wash Sequence
- Pre-rinse with tap water — remove loose dirt and debris to prevent scratching during the wash step. Do not use DI water for this.
- Wash with soap and tap water — use your preferred car soap and wash mitt or foam cannon. Tap water throughout this step.
- Rinse off soap with tap water — confirm no soap residue remains on any surface.
- Apply DI rinse immediately while vehicle is still wet — flood each panel, glass, and trim surface liberally. Work top to bottom. Do not allow any tap water to dry before applying the DI rinse.
- Allow to air dry — or use a leaf blower to accelerate drying. Do not towel-dry immediately after the DI rinse. The 0 TDS water leaves nothing behind when it evaporates — toweling is not necessary and risks micro-scratches.
- Test TDS after the session — document the reading to track resin status.
Resin Replacement — Complete Procedure
When outlet TDS reaches approximately 20 ppm, it is time to replace the resin. The tank is permanent — only the resin inside is changed. Purchase the correct refill kit size matching your model: 0.5 cu/ft for the 117-SFR-0.5, 1.0 cu/ft for the 117-SFR-1.0. You will also need a bucket, garden hose for flushing, and optionally a wet/dry vacuum.
Shut off water and disconnect hoses
Turn off the spigot. Disconnect both garden hoses from the tank fittings.
Remove the In/Out head
Unscrew the head counterclockwise and set aside — it will be reinstalled with the new resin charge.
Remove old resin
Invert the tank over a bucket or outdoor area and flush with a garden hose to remove the exhausted resin beads. A wet/dry vacuum can also suction out the resin. Rinse the tank interior and the distributor tube with clean water.
CRITICAL — Cover the center distributor pipe
The center distributor tube must remain in the tank. Before adding new resin, cover the open top of the center pipe with the cap provided in the refill kit, or seal it with tape. If resin beads enter the center pipe, they will restrict or block water flow through the system — this is the single most common installation error.
Fill with new resin
Pour the new mixed-bed DI resin into the tank using the funnel provided in the refill kit. Fill as completely as possible — more resin means more capacity. Gently tap the sides of the tank with a rubber mallet or dead-blow hammer while filling to settle and pack the beads, allowing more resin to fit.
Save unused resin
If any resin remains after filling, seal it in the bag provided and store in a cool, dry location for the next refill.
Remove the center pipe cover
Remove the cap or tape from the top of the distributor tube before reinstalling the head. Do not skip this step.
Reinstall the head, flush, and verify
Inspect and clean the O-ring and groove (see O-ring maintenance section). Slide the basket over the distributor tube, confirm O-ring is seated evenly, screw head clockwise until snug. Reconnect hoses. Turn on water and flush 60 seconds. Test outlet TDS — should read 0 ppm. If elevated, flush another 60 seconds and retest.
O-Ring Maintenance
The O-ring that seals the head to the tank is a critical component. Inspect it at every resin change — a single resin bead trapped in the O-ring groove will prevent a watertight seal and cause dripping around the head.
- Clean the O-ring groove and seating surface at every head removal
- Use silicone-based lubricant only (such as Super Lube) if lubricating the O-ring — never petroleum-based products like Vaseline or petroleum jelly, which degrade rubber O-rings over time
- Replace the O-ring if it shows cracking, flat spots, or compression set (permanently flattened from repeated sealing)
Applications
| Application | Why DI Rinse Works | Notes |
|---|---|---|
| Cars, trucks, motorcycles | 0 TDS water leaves no mineral deposits when it evaporates | Primary application — most effective on dark-colored vehicles where spots are most visible |
| RVs and semi-trucks | Large surface area covered efficiently; eliminates drying time | 0.5 cu/ft model may exhaust faster on large vehicles at a single session; 1.0 cu/ft recommended |
| Home windows and glass | Streak-free drying without squeegee | Effective for window cleaning finishing rinse; also eliminates water mark buildup at weep holes |
| Solar panels | Mineral deposits reduce panel efficiency; DI rinse restores clarity without residue | Solar panels are sensitive to mineral fouling — DI rinse is ideal for periodic cleaning |
| Tractors and farm equipment | Reduces rust-promoting mineral deposits on metal surfaces | High-TDS well water common in rural areas — test TDS before estimating resin life |
| Boat hulls and marine | Salt water rinse residue and hard water spots both eliminated | Post-saltwater rinse with DI water reduces salt crystal deposits and corrosion sites |
Which Model to Choose
| 117-SFR-0.5 | 117-SFR-1.0 | |
|---|---|---|
| Best for | 1–2 vehicles; soft to moderate water (<150 ppm); portable/mobile use | Multiple vehicles; hard water (>200 ppm); detailers; high-frequency washers |
| Resin capacity | ~1,000 gallons at 110 ppm TDS | ~2,000 gallons at 110 ppm TDS |
| Portability | More portable — shorter tank | Heavier and taller — less mobile |
| Refill cost | Lower per refill (0.5 cu/ft kit) | Higher per refill, lower per-gallon cost |
| Hard water verdict | Will require frequent refills at >250 ppm | Strongly recommended for hard water areas |
Troubleshooting
| Problem | Likely Cause | Resolution |
|---|---|---|
| Outlet TDS above 0 after new resin install | Resin fines not yet flushed; O-ring leak allowing bypass | Flush for an additional 60–120 seconds. Inspect O-ring — confirm seated evenly with no debris in groove. Retighten head. |
| Leaking around head | O-ring displaced, twisted, or resin bead trapped in O-ring groove | Remove head, clean O-ring groove thoroughly, inspect O-ring for damage, reseat carefully, retighten. |
| Resin exhausting faster than expected | Feed water TDS higher than anticipated; elevated CO₂ in well water | Test inlet TDS and compare to capacity table. Test for CO₂ if on well water. Consider upgrading to 1.0 cu/ft model. |
| Low water flow from outlet | Resin packed into distributor tube during refill | Remove head, inspect distributor tube opening — if blocked, flush aggressively or use a thin rod to clear. Reinstall head with center pipe covered during future refills. |
| TDS reading inconsistent | Testing standing water instead of flowing water; meter battery low | Always test flowing water with probe in the stream. Replace TDS meter battery if reading is erratic. |
| Visible water spots despite 0 ppm TDS reading | Tap water dried on surface before DI rinse applied; residual soap not fully rinsed | Apply DI rinse immediately while vehicle is still wet. Confirm all soap is rinsed with tap water before DI application. |
FAQ
How long does the Allegro DI resin last?
Entirely depends on feed water TDS. At 50 ppm (soft water) the 0.5 cu/ft model produces approximately 2,000 gallons. At 300 ppm (very hard water) approximately 325 gallons. The 1.0 cu/ft model doubles both figures. Using DI water only for the final rinse (5–15 gallons per vehicle) rather than the entire wash (30–80 gallons) extends resin life by 3–5×. Test your tap water TDS before buying to calculate your expected interval.
When should I replace the resin?
When the TDS meter at the outlet reads approximately 20 ppm or higher during flowing water testing. At that level, visible water spots will appear on most vehicles. The tank is permanent — only the resin inside is replaced. Match refill kit size to your model: 0.5 cu/ft for 117-SFR-0.5, 1.0 cu/ft for 117-SFR-1.0.
Can the resin be regenerated?
No. Regenerating mixed-bed DI resin requires separating the cation and anion bead types and treating each with acid and caustic solutions — equipment costing over $10,000. For residential and mobile systems, resin replacement is the correct approach. Spent resin is non-hazardous and can go in a standard landfill.
What TDS should the outlet read?
0 ppm from freshly charged resin. 0–10 ppm is excellent. 10–20 ppm is acceptable. At or above 20 ppm, replace the resin. Always test flowing water, not standing water, and wait 2–3 seconds for a stable reading.
Does it work with a pressure washer?
Yes — the outlet fitting connects to a standard garden hose, which connects to a pressure washer inlet. The system operates on normal household water pressure (40–80 PSI). US Water Systems recommends a spray wand for the final DI rinse rather than a high-pressure lance to maximize coverage and minimize wasted resin capacity.